
How to acquire hyperspectral data in a lab
Optimizing Laboratory Hyperspectral Imaging: Best Practices
Hyperspectral imaging (HSI) has become an invaluable tool in laboratory environments, providing detailed spectral data that supports material analysis, quality control, and research across a range of industries and applications. To maximize the value of HSI data, laboratory professionals need to understand the fundamental components of a successful setup and implement best practices for data acquisition and processing.
Below, we outline key considerations and guidelines to help you achieve accurate, consistent, and repeatable hyperspectral imaging results.
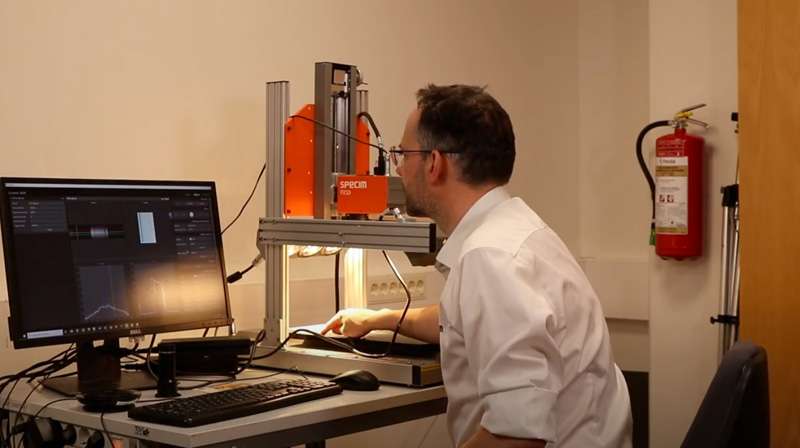
Introduction to Laboratory Hyperspectral Imaging
Laboratory-based hyperspectral imaging involves capturing detailed spectral information for each pixel of a sample, allowing researchers and quality control professionals to identify materials and analyze properties at a molecular level. Unlike traditional imaging methods, HSI captures hundreds of spectral bands simultaneously, delivering comprehensive data for precise analysis.
In laboratory settings, line-scan hyperspectral imaging – sometimes referred to as “pushbroom” imaging – is the most commonly used approach. Line-scan HSI systems acquire data one line at a time as the sample moves under the sensor, ensuring high spectral fidelity and spatial resolution. This method is particularly effective for controlled, repeatable measurements in research, materials testing, and industrial quality control.
Essential Equipment and Setup Considerations
A reliable laboratory hyperspectral imaging system begins with choosing the right equipment and setting it up properly. This section outlines the key components and setup considerations to ensure precise and repeatable measurements:
1. Camera
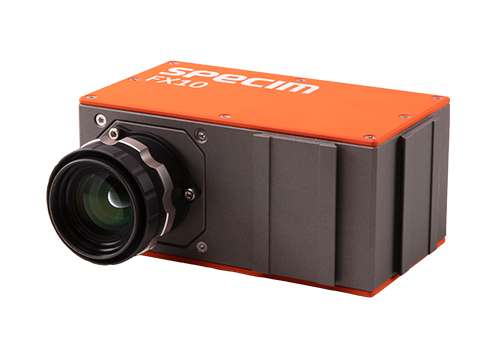
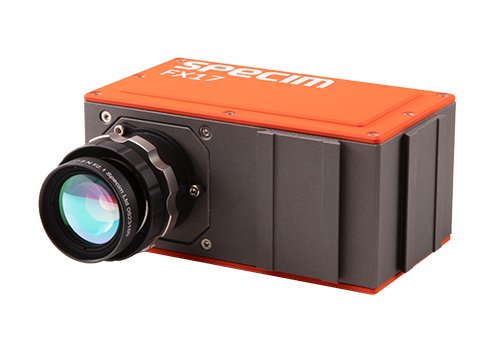
A laboratory hyperspectral imaging setup starts with selecting the right camera. Specim line-scan hyperspectral cameras are designed for high performance in lab environments, covering the full spectral range from VNIR to LWIR.


2. Scanner
Motorized scanners provide precise and consistent movement of samples under the camera, which is crucial for a complete data acquisition of a sample. The constant speed of the scanner is necessary to keep distortion-free hyperspectral data cubes. Specim offers versatile scanners to suit different sample sizes and imaging needs:
- Specim Lab Scanner 40×20: Ideal for smaller samples, compatible with Specim FX10, FX17, GX17, SX25, and SWIR cameras.
- Specim Lab Scanner 100×50: Suitable for larger samples and fully compatible with all Specim cameras, including the FX50 and FX120 and their thermal illumination requirements..
- SisuROCK: Multi-camera workstation designed for fast and easy spectral imaging of drill cores and geological samples. Compatible with Specim FX10, SX25, SWIR, FX50, and FX120 cameras, it provides comprehensive imaging from VNIR to LWIR and also includes an RGB camera and 3D imager for detailed surface analysis.
Notice that the camera could also move on a translation stage, when the sample cannot be moved. Additionally, the camera can rotate on a rotary scanner.


3. Lighting
Lighting is another critical factor in hyperspectral imaging. Halogen lamps are widely used because they provide a continuous spectrum that spans the VNIR, NIR, and SWIR spectral ranges. Time and spatial consistency of the illumination is critical for the most relevant and accurate results. Also, special attention needs to be given to the pass line, as not all objects are flat.
LED illumination is also an option, especially when low heat emission, energy efficiency, or specific wavelength control is preferred. For imaging in the MWIR and LWIR ranges, thermal illumination is required.

4. Lens
Lenses must be carefully selected to match the desired field of view and spatial resolution. Specim provides compatible lenses for all their camera models – from broad overviews to wide-area overviews to high-resolution close-ups, allowing for different image samples at various resolutions. Specim lenses’ transmission is optimized for the quickest data acquisition (i.e., related to a low integration time) and lowest distortion (including keystone, vignetting, and stray light).
5. Software
For data capture and analysis, specialized software is crucial. Specim’s Lumo software offers real-time data acquisition with a user-friendly graphical user interface, ensuring that your images are correctly acquired. Additionally, its automatic workflow for acquiring dark and white reference data is very helpful for data preprocessing, such as normalization. Also, camera acquisition is synchronized with Specim’s scanners for seamless operation.
For data visualization, SpecimINSIGHT is another dedicated software that allows users to build chemometric models.


Data Acquisition Techniques
Once your lab setup is ready, the next step is to ensure your data acquisition process captures reliable hyperspectral data. This involves careful adjustment of key parameters:
Integration Time:
Set the exposure so that the detector’s dynamic range is optimally utilized without saturation (ca. 80% of the maximum dynamic range). Too short, and your images may be noisier; too long, and you risk losing data through overexposure. Proper integration time captures enough light to produce clear, high-quality images, avoiding underexposure or data clipping.
Frame Rate and Scanning Speed:
These must be matched to avoid image distortion. If scanning speed is too fast, round objects may appear flattened; if it is too slow, they may be stretched. Use a round target – like a white circle on black paper – to calibrate scanning speed and ensure accurate spatial representation.
Binning:
For low-light samples or when maximum data accuracy is needed, grouping adjacent pixels (binning) can significantly enhance the signal-to-noise ratio (SNR). Binning can be done in the spatial and spectral dimensions.
Live Monitoring:
Use your software’s live views, like Specim’s Lumo Scanner’s waterfall or spectral profile views, to monitor alignment, focus, and exposure in real time. This helps identify issues early and ensures the integrity of your data.
Ensuring Mechanical Stability:
Finally, mechanical stability is crucial for achieving reliable results. Even slight vibrations can degrade image quality by introducing a blur, especially in macro imaging. Carefully aligning the setup, fine-tuning the focus, and stabilizing your scanner and camera help to ensure that your measurements are accurate and repeatable.
Ensuring Data Quality through Reference Measurements
High-quality hyperspectral imaging data depends on reliable reference measurements, and this is where calibration panels play a crucial role. White reference panels (often Teflon-based) measure the incident light seen by the camera, taking into account its sensitivity (and also correcting for illumination spatial variations), while dark reference calibration (with the camera shutter closed) measures sensor noise. These steps help establish accurate baseline measurements, ensuring your data remains consistent and comparable across different samples and lighting conditions (called normalization).
When to take new references:
- If you change the integration time or frame rate.
- If the illumination changes.
- At the start of each measurement session to ensure accuracy.
- Some cameras might be sensitive to ambient temperature. Therefore, if the ambient temperature changes significantly, taking new reference data would make sense.
Best practices:
- Clean the white reference regularly to avoid dust and contamination.
- Position the white reference at the same height as the sample to ensure a comparable reflectance level.
Consistently incorporating these calibration steps ensures that your data remains accurate and reliable, regardless of how your setup evolves.
Pre-Processing Techniques for Reliable Results
Once the raw data is captured, the next step is to transform it into a format that’s ready for analysis. Pre-processing techniques like dark current subtraction and white reference normalization some eliminate measurement artifacts and standardize your data. These steps might seem minor, but they’re essential for aligning spectral information and making sure your results are reliable and consistent across repeated tests. I would also enhance the robustness and transferability of later chemometric models based on these data.
Applications and Case Studies in Laboratory Settings
With a robust setup and well-calibrated workflow, hyperspectral imaging in the laboratory becomes a powerful tool for precise material analysis across various industries and research fields. Here are a few key application areas where HSI is making a significant impact:


No matter the application, the same principles of careful calibration, thoughtful data acquisition, and precise pre-processing apply – delivering high-quality spectral data that empowers confident decision-making.
Ready to Take Your Lab Imaging to the Next Level?
Specim’s laboratory imaging solutions are designed to deliver lab-grade precision and reliability. With decades of experience in hyperspectral innovation, Specim helps you achieve consistent, high-quality data in controlled laboratory environments – ensuring that your results support confident decision-making and real-world impact. To learn more, contact our team.
Learn More – Watch the Webinar
Want to see these best practices in action? Watch our recorded webinar on laboratory hyperspectral imaging, where a Specim expert walks you through proven techniques for system setup, data acquisition, and pre-processing in the lab. You’ll learn practical tips for optimizing your equipment, ensuring accurate measurements, and overcoming common challenges – so you can make the most of your hyperspectral imaging system.

Watch the webinar to gain practical insights and elevate your laboratory HSI workflows to the next level.

